Why Prep Work Determines Everything
Most backsplash projects that go wrong don't fail during tiling — they fail before a single tile is pressed into place. Grease residue left on kitchen walls prevents adhesive from bonding properly. Paint that wasn't primed or a surface that flexes slightly will cause tiles to pop loose within months. Taking the time to do this right from the start is what separates a backsplash that lasts decades from one that needs rework in a year.
Before you begin, review the room-by-room readiness checklist to confirm your space is properly set up. It covers protecting countertops and appliances, turning off power to outlets in the work zone, and gathering everything you need so work isn't interrupted mid-adhesive.
What you will need
Tools and Materials You'll Need
Having the right tools on hand before you start prevents the frustration of stopping mid-project. The list below covers the essentials for a standard ceramic or porcelain tile backsplash installation.
Notched trowel
Spreads tile adhesive at a consistent depth to ensure even bonding across the tile back.
Tile spacers
Maintains uniform grout line width between tiles throughout the installation.
Grout float
Pushes grout into joints evenly and cleans excess off the tile surface.
Tile cutter or wet saw
Makes clean, precise cuts for edge tiles and around outlets.
Spirit level
Verifies that reference lines and tile rows are perfectly horizontal.
Sponge and bucket
Used to clean grout haze from tile surfaces during the grouting stage.
Penetrating grout sealer
Applied after grouting cures to protect joints from moisture and staining.
Painter's tape
Protects edges, countertops, and outlet surrounds from adhesive and grout smears.
When estimating tile quantity, add 10–15% to your measured area to account for cuts and breakage. Ordering exactly what you need often results in a trip back to the store midway through.
Step-by-Step Installation
Work methodically from your reference lines outward. Each step builds directly on the last — skipping or rushing any one of them is the kind of shortcut that shows up in the finished result. As noted in our piece on rushed repairs that create bigger headaches, cutting corners during installation often means far more work undoing damage later.
Clean and prepare the wall surface
Degrease the wall thoroughly using a TSP (trisodium phosphate) substitute cleaner or a strong dish soap solution. Wipe it down, rinse, and allow it to dry completely — at least several hours. Sand any glossy painted areas lightly to give the adhesive something to grip. Fill minor dents or low spots with wall filler and sand smooth once dry.
Mark your reference lines
Find the horizontal midpoint of your backsplash area and draw a level horizontal line across the wall using a spirit level and pencil. This is your baseline — all tile rows work upward from here. Then find the vertical center of the wall and draw a plumb vertical line. These two intersecting lines guide the entire layout and prevent the creeping drift that makes finished tile look crooked.
Mix and apply tile adhesive
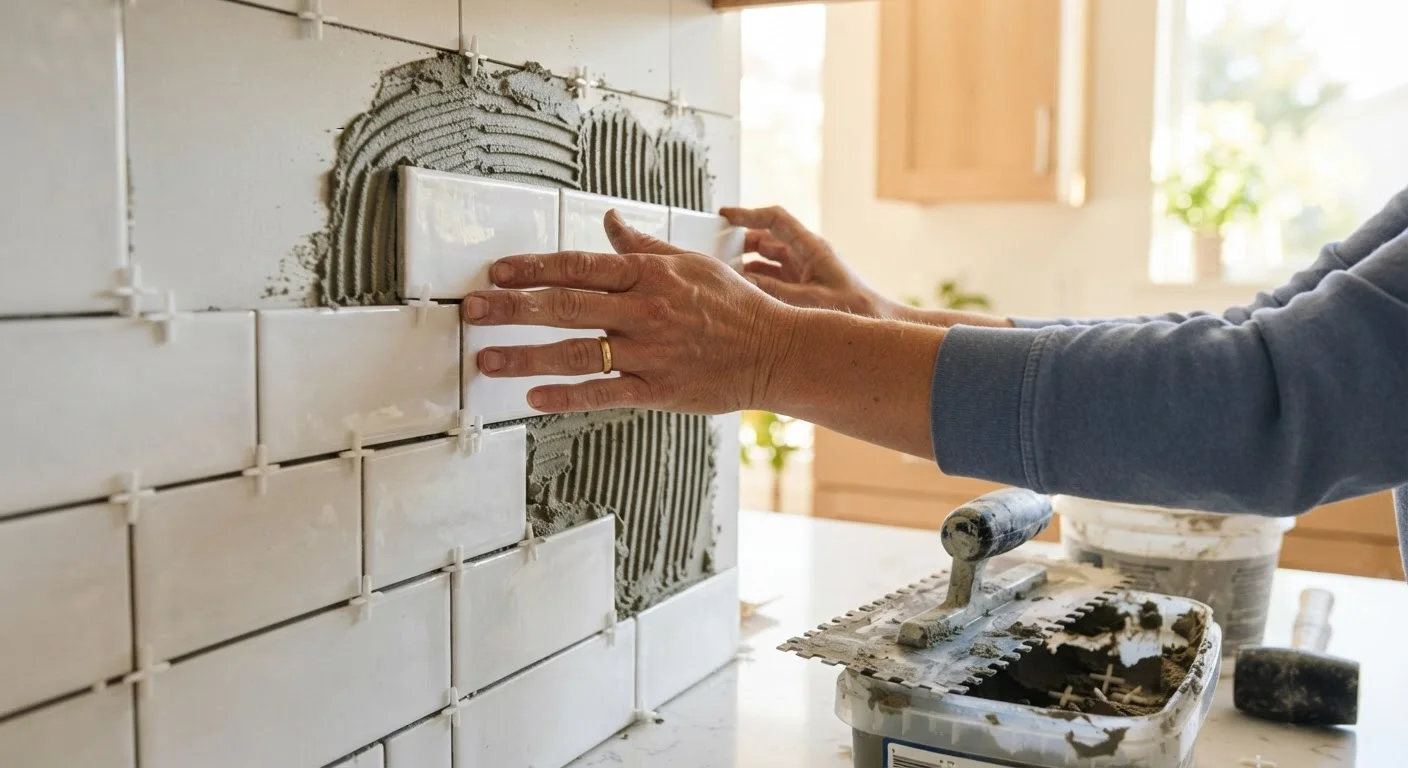
Mix your tile adhesive (also called mastic or thinset, depending on the product) according to package directions. Using the notched side of your trowel, spread adhesive in a small section — roughly one to two square feet at a time. Hold the trowel at a 45-degree angle to create consistent ridges. Work in manageable sections so the adhesive doesn't skin over before tiles are set.
Set tiles with spacers
Press each tile firmly into the adhesive with a slight twisting motion to ensure full contact. Place tile spacers at every corner joint immediately after setting each tile. Use a spirit level frequently — every few tiles — to confirm rows stay horizontal. Tap tiles gently with a rubber mallet and a scrap of wood to seat them without cracking.
Cut tiles for edges and outlets
Measure each cut tile individually rather than assuming all edge gaps are identical. Mark the cut line with a pencil, then use a tile cutter for straight cuts or a wet saw for curves and notches around outlets. For outlet boxes, a tile hole saw bit works well for clean circular cuts. Dry-fit every cut piece before applying adhesive to it.
Allow adhesive to cure fully before grouting
Once all tiles are set, remove spacers while the adhesive is still slightly pliable — usually within a few hours. Then leave everything undisturbed for the full cure time stated on your adhesive packaging, typically 24 hours minimum. Do not grout early. Tiles that haven't fully bonded can shift when pressure is applied during grouting, ruining alignment.
Grouting, Sealing, and Common Mistakes
Once your adhesive has fully cured — typically 24 hours, but check the manufacturer's guidance — you're ready to grout. Mix grout to a peanut butter consistency: smooth, firm, and free of dry clumps. Work it diagonally across the tiles using a grout float, pressing it firmly into every joint. After 15–20 minutes, wipe away the haze with a damp (not wet) sponge in circular motions. Repeat the wipe-down once more after another 20 minutes.
Don't Over-Wet the Sponge During Cleanup
Excess water during grout cleanup is one of the most common beginner mistakes. A waterlogged sponge weakens fresh grout, pulls it out of joints, and causes uneven curing. Wring the sponge until it's barely damp before each pass across the tiles.
After grout has cured for the period specified on the packaging (usually 48–72 hours), apply a penetrating grout sealer. This step is skipped far too often. Unsealed grout in a kitchen absorbs cooking grease and moisture, leading to staining and the kind of recurring cracking covered in why grout cracks keep coming back. A single application of sealer takes less than 20 minutes and extends the life of your grout significantly.
Wipe Tiles Before Sealer Fully Cures
If you notice a cloudy haze on tiles after grouting, buff it away with a dry microfiber cloth before the grout sealer is applied — not after. Once sealer locks in a haze, removing it requires more abrasive effort. A quick buff at the right moment keeps tiles looking sharp.